DSL for Pandas and Spark
Quick overview
Every statement in this DSL starts with the prefix ##. A DSL line is treated as a Python comment, allowing the DSL to be integrated with regular code. To see which operations are available at the current position, press the code recommendation key (in Windows, Ctrl + space). You can chain multiple DSL operations via | (pipe-character). When ready, press the code recommendation key again to see the generated code as a first suggestion. A more detailed description of the DSL is given in our GPCE 2019 paper.
Info: Sample data and scripts used for testing the NLDSL extension are published on the test cases repository.
Selecting target framework
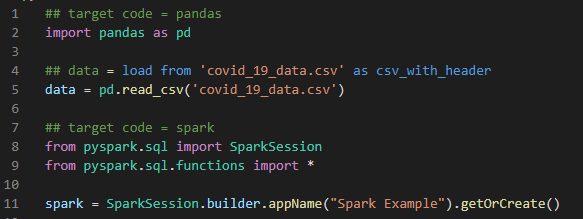
You can customize for which framework the Python code will be generated by selecting between Pandas, Apache Spark, PyTorch, Tensorflow or a self defined DSL. In order to do this, you need to insert a code line starting with ## target code = <framework>, e.g. ## target code = pandas or ## target code = spark. As a help, the code recommendation will show you the option set target code in first code line starting with ##. As another help, the next code suggestion after selecting the target framework will be initialize libs, this ensures that the DSL automatically imports the necessary python libraries.
Note: Tensorflow and PyTorch are still in alpha state. Further functionality will be added in later versions.

It is possible to change the selected target framework freely in the source file. For example, the below snippet uses Spark and Pandas in the same document.
Code recommendation
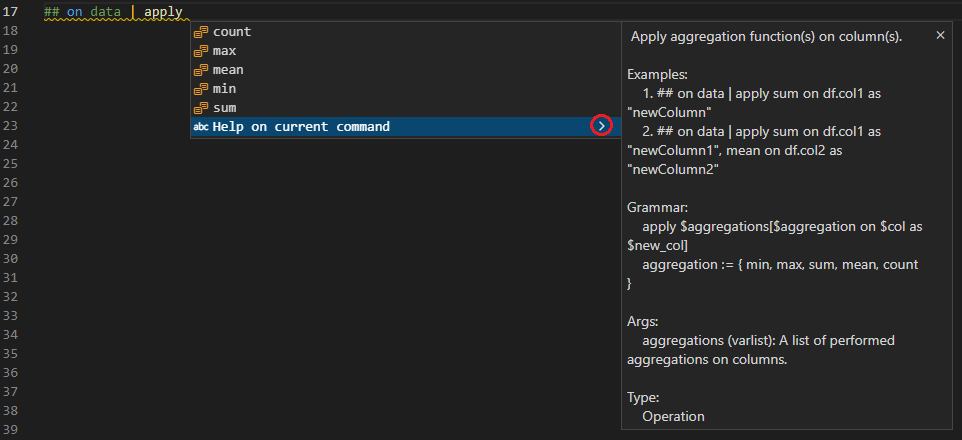
At each line starting with ##, NLDSL extension shows recommendations after pressing Ctrl + space on the keyboard. The recommendations show possible operations of our DSL together with the documentation, examples, and grammar definition.
The recommendations are based on the context of the pipeline.
At the beginning of the pipeline, users get recommendations on how to create, load and reference a data table to apply further operations.
After selecting one operation and supplying optional parameters, you can attach another operation using
|(the pipe character).After finishing your DSL expression, press Ctrl + space to see the recommendation with generated Pandas (or Spark) code. The first recommendation is the generated code, press Enter to insert it. This code is only generated if DSL expression has correct syntax.
In-editor documentation
NLDSL has an included in-editor documentation to find out more about the available DSL commands. To show the documentation, select the arrow next to the code recommendation option "Help on current command".
Inspecting and exploring data
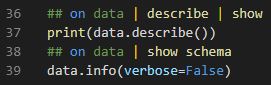
The DSL comes embedded with several functions that enable easy data table inspection. For example:
Describing the Pandas data frame content and printing the schema of the data frame
Selecting a subset of columns and printing the first 10 rows

Using non-trivial operations such as grouping and sorting

Data preprocessing
The DSL also contains a set of operations for commonly used data manipulation such as the append column transformation below.

Type provider feature
NLDSL can suggest column names which are fetched from a CSV file if it has header information included. In order to use this feature, you need to set source of information for column names recommendation first.

In which:
- name: the name of the dataframe, this should be consistent with the name of the dataframe in the code
- type: the type of the data file. Currently, we only support CSV files
- path: the path to the data file
After setting the source information, NLDSL can now suggest column names of the defined dataframe. E.g. selecting column 'Province/State' of dataframe 'data'

Synchronization feature
Regardless of the programming language used, DSL lines are comments that are not executed. The translation of DSL lines, the code lines are executed. These lines can be edited independently and thus cause them to be out of synchronization. They are out of synchronization if the translation of the DSL line doesn't match the following code line. We will mark out of synchronization lines as warnings in VS Code.
Most of the generated TensorFlow and PyTorch code will be shown as "out of sync" at the moment because of the missing feature to check multiple lines of code for a DSL line. This will be added in later versions.

Extending the DSL via internal functions
Internal functions are customized DSL commands created by parametrized chains of DSL operations are defined using the prefix #$
The following command creates a new DSL rule called div columns, that receives two data frame columns and performs their division, assigning the result to a specified column ($res). This implementation is based on the already supported append column operation.

Soon after defining the internal function, the language server can already recommend the div columns operation as one of the DSL code recommendations.
The div columns is ready to be used and generates the following code

Creating a new DSL
For an in-depth explanation of this feature, visit the DSL documentation.
It is possible, in an easy way, to create a new DSL with the wizard of the NLDSL extension. The definition of the DSL is done through an Excel sheet/tx file.
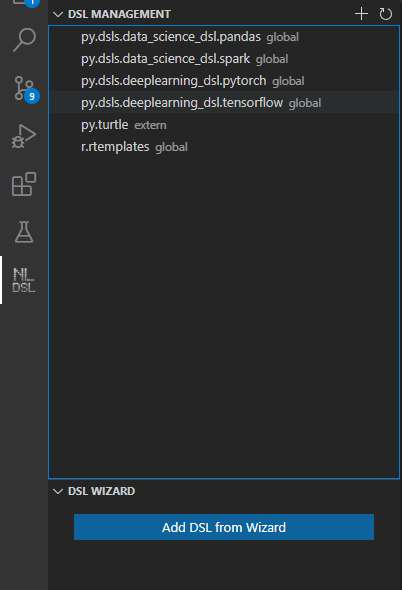
The wizard window is also the place to remove DSLs. You simply right-click the DSL you want to remove and select Remove in the context menu.
How to use a DSL definition
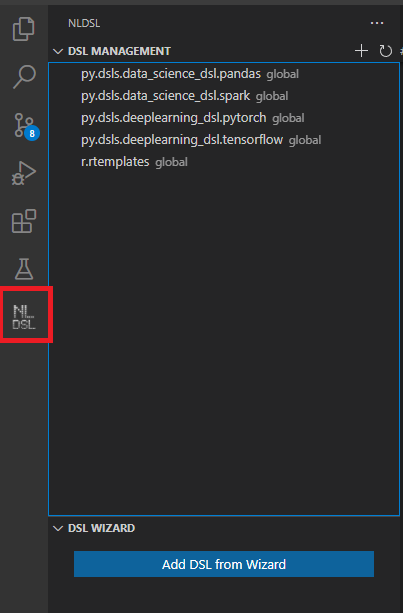
To use a DSL definition, open the NLDSL menu from the sidebar and click on Add DSL from wizard.
In the next step, select create DSL from the command menu.

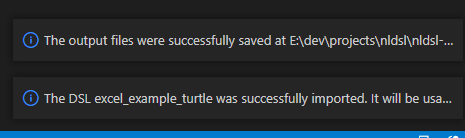
Now follow the wizard and first enter the path to the xlsx or tx file of your DSL definition. After that, specify an output folder in which the DSL you create will be saved. The name of the output folder is the DSL name which will be used internally in the NLDSL extension. Now wait until you get a notification that the created DSL was imported successfully and restart VSCode in order to use the DSL.
After the restart, you can see that your DSL was imported when you open the NLDSL menu in the side panel. Your newly created DSL should be shown in the list now.
Note: When you re-add a DSL to the same output folder (e.g. after modifying the Excel or tx file), the previously generated files of the DSL will be overridden
Use the new DSL
Open a source file and use the target code recommendation feature. Now you can see your new DSL in the target code recommendations list.
After setting the target code to your new DSL, you can use it as any other already existing DSL.